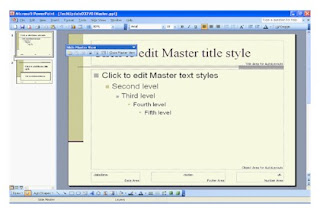
 The PowerPoint Slide Master contains objects that you want to appear on each slide in your presentation. With a Slide Master, you only have to create an item once and PowerPoint will automatically include them on every slide. Some things are set up by PowerPoint (for example; place for slide title and text) so you don't have to create them each time. If you want to add additional items to a master, you can at any time. The Slide Master has boxes already set up for the slide title and text. They're called the Master Title and the Master Body object. The format of these objects determines the way your text will look on each slide. You can always make slides look different from the Slide Master, but a Slide Master gives you a consistent starting point.
From anywhere within your presentation, go to the View menu, click Master, and then click Slide Master. You will now be in the Master View mode, as shown above (top example).
Note four key areas in this view, which shows you the presentation's title page.
- On the slide itself are two large boxes that allow you to edit the Master title and subtitle styles.
- In the left navigation bar, you will see two thumbnail slides. One is the Title Slide view, and above it is the slide view for the rest of the interior slides. In the example above, you will see I have selected the Title Slide.
- A small, useful toolbar called Slide Master View appears as well. In this article we use only Close Master View.
- Finally, note the bottom portion of the slide. It shows the date, footer, and number areas
To include the date from the Master title page:
- In the Date Area box, highlight
and enter the date you wish to use. - Click Close Master View on the toolbar.
You should now see the date automatically noted on your title page, as shown on the second example above.
To make similar changes on slide pages that follow the title page, simply select the slide page thumbnail on the left within the Master View. You can then make changes to the bullet styles and indentations PowerPoint automatically sets up for you. Don't like a bullet color? Select the interior slide Master View and just change it to the color you want.
Tip: Page numbers are added by default. However, if you want to remove page numbers from your presentation, remove <#> from the Number Area.
Note: If you want a date to appear on both your title and interior slide pages, you must edit each page type from within the Master View.


No comments:
Post a Comment